To Apply Different Colors for Different Weld Types
-
Locate the
OPModeler.dgnlib file for the WorkSet you plan
to apply different colors for different Weld Types. For this example we will
use the default OpenPlantImperial WorkSet located in the following location
C:\ProgramData\Bentley\OpenPlant CONNECT Edition\Configuration\WorkSpaces\OpenPlantExample\WorkSets\Imperial\Standards\OpenPlant\Modeler\Dgnlibs
- Double click the file to open.
- Open Element Templates dialog.
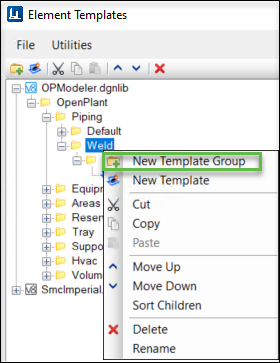
- Add a New Template Group under Weld folder.
- Rename the folder with Weld Type name.
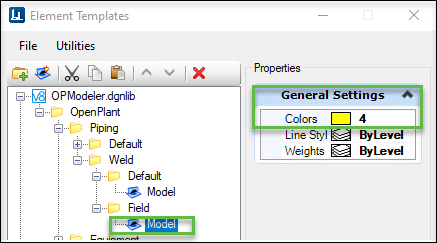
- Copy the Model from Default folder and change the Color from General Settings.
- Close the Element Templates dialog.
- Open Named expression dialog.
-
In
OP_SYMBOLOGY_WELD add expression for Weld
Types.
For example,
"BY_LEVEL_AND_TEMPLATE:" & "P-" & PIPELINE.SERVICE_NAME
&":OpenPlant\Piping\Weld\"&
IIF( OPITEM.TYPE = "FIELD", "Field\:", "Default\:" )& "Model"
- Save the changes and close the Named expression dialog.
- Launch OpenPlant Modeler in the OpenPlantImperial WorkSet.
- Create Associations & Route a Pipeline to create a couple of fittings with weld joints.
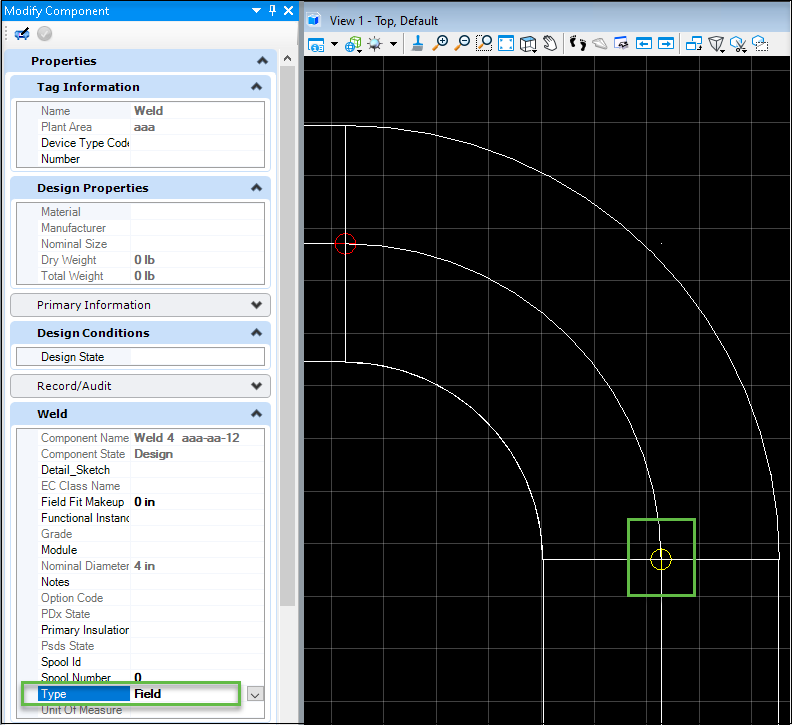
- Select a Weld, right-click modify and change Weld Type.